
What to frame & ideal style
What to frame
Like the tailor makes the man, good artworks need well-designed frames to decorate. Whether you have a newly painted masterpiece waiting to be hung or receive a good photograph that you would like to display, a personalized frame with ingenious design will be necessary to make it more likely an artwork.

Besides pictures, you could open a totally new path by framing paper with written words or a wooden board engraved with any motto you like. Some people might also choose to frame words like wedding vows to commemorate that meaningful moment forever, or make it as a souvenir in memory of their anniversaries.
Desired style
The second thing that needs to be decided is the overall style you want for your frame. Tastes and preferences vary from individual to individual, style choosing could be an exciting or struggling process for someone. From vintage to modern, from classic to chic, from Victorian to Edwardian, no matter which one you choose, how you would like to combine with, just stick to your desire and try to approach it step by step during the custom process.
Extra customization
Besides the frame itself, sometimes people will need extra customizing service, especially for those who are preparing gifts. Therefore, if you want the gift you prepared to stand out from others, why not consider making a personalized package design.
Material Choose
Frame
Speaking of the most commonly used material of picture frames, these three often automatically come to our mind: wood, metal and plastic. And among these, it’s generally believed that wood will be the ideal material for vintage picture frames while metal and plastic go well with frames for a simple and modern style. However, it’s not always like that in a real decorating situation. It’s not a strict rule or something that we should all comply with. Take vintage picture frames as examples:
Based on the distinguished artistic taste of people in different periods of history, the style of vintage could be classified into several types. Like before 1820s, anything suits well with gilt molding, while during the 1850s-1900s, people preferred beaded frames made of dark colored wood like mahogany, ebony. And when time came to the 1930s, people also enjoyed wooden picture frames, only in wider and lighter frames. Later then, light colored wood like oak and pine were widely used as well.
After all, when judging how well a frame matches with the interior or whether they are in similar styles, designers always have their own subjective opinions. Victorian Style, Edwardian Style, who says you won’t have a style?
Protective board

If you think of this print as a sandwich, it would go cover board in front, mat board (if needed) and print in the middle, and backer board on the back. A good protective board is an integral element of a well-made picture frame. It protects the artwork inside from dust and possible damage while displaying its beauty and “floating” your pictures at the same time. Most traditional protective boards are made of normal glass, but with the development of materials manufacturing, some with more budget would use plexiglass to replace as glass is too delicate and heavy in use.
Backboard
Once you’ve got the glass to place into the groove, and then put the print and mat in. One last thing you will need is a back board. Usually a pre-cut plywood, which you could get from any craft store or even online, would work perfectly when fit in the groove. But if you don’t have plywood, some good, stiff cardboards also works fine. Besides, you could always cut it out into a custom size if the standard size suits terribly with your frame.
Measurements
What to do next is to make sure to be as accurate as possible while taking measurements. There is some room for error on a couple of them but most of them must be as accurate as possible.
The most important object needed to be generated is the measurements for the picture frame, including sizes of artwork inside, mat board, glass and backboard. The size of your picture frame will depend on the size of things that you are going to frame. Here is the formula for your reference. Take framing a picture as an example.
First, you need the dimensions of the picture you are framing, the width of the mat you want around the picture, and lastly, the width of wood you want your frame pieces to be. Then the formula for your board lengths is:
Width=width of picture + (2 x width of mat) + (2 x width of frame) – ¾″
Height= height of picture + (2 x height of mat) + (2 x width of frame) – ¾″
The next is the backboard, which is the bottom layer of the frame, where the picture is mounted to. It should be stiff and strong enough to support the picture. And for your reference, a chip board around 1/8" thick is ideal, though acid free chip board would be even better if it is available.
As for the glass, it usually fits well with the frame as long as it’s made in accordance with the size of the picture and the mat board. Just remember to order it slightly smaller than the exact opening because you can’t cut glass very easily if it’s too big. If it is too big, you will need to chisel out the frame until it fits, which really stinks, so avoid it if possible.
Crafts
After deciding all the basic components, it’s time to think about embellishing your frame thus enhancing its value. Obviously the easiest and convenient way is to select an experienced craftsman or a great team of frame manufacturing locally, meanwhile, some online teams are pretty reliable as well if you choose carefully. The things you need to decide are what finishes and crafts you would like to use, staining or spray painting, engraving or embossing, and furthermore, to consider the final effect that you want. With their professional craft ships, there is no need to worry about the final good as it would definitely come with fine works.
Do it by yourself
Handing all the work to the professionals indeed saves a lot of trouble and time, however, it costs much accordingly as well. Therefore, making custom picture frames by yourself is really a fairly simple project once you get all measurements figured out and could save you HUNDREDS of dollars vs directly purchasing a custom built frame. For your reference, here are some tools and material you need to prepare if you decide to make it all by yourself.
Workplace:To start with, you will need a wide empty table or desk as your workplace. This desk should be stable and can bear the pressure of operating handcrafting of medium level. And if you are using a temporary desk, before beginning, remember to put on a sheet first to prevent unwanted scratches that may be caused by cutting and sawing.
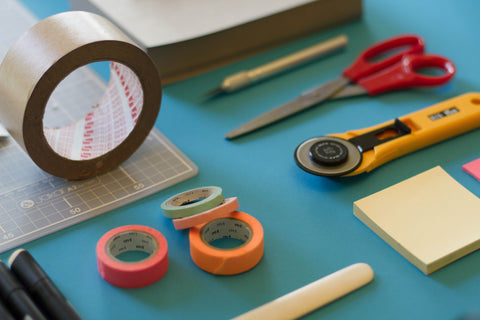
Basic tools: Secondly, you will need some common hand tools like scissors and knives to deal with some easy cuttings on papers. A bottle of glue is also necessary when assembling different components of the frame.
Tools for measurements: As previously mentioned, comparably precise measurements are of great importance to lay a good foundation of making a delicate frame. Therefore, a tape measure is necessary and convenient in this procedure, and a pencil also helps you record all the datas.
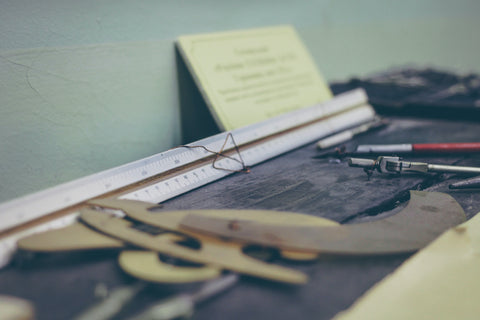
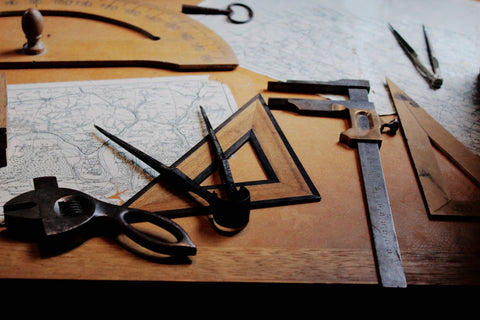
Technical tools: Based on the crafts types you are going to use, you will also need some professional tools like router, saw, sharp box, hammer, drill and sometimes even nail gun. Just to make sure you know how to operate or turn to professionals for help and be safe!
That’s all for what needs to be done before making your personalized frames. No matter if you choose to hand everything to an experienced team or finish all works by yourself, make sure what you really want in the beginning and stick to it, in this case, I’m sure everything would be worthwhile in the end.